Posts

Posts uit juni, 2018 tonen

Routering

Afbeelding
The daggerboard can be used, now. I drilled a hole in the bottom with an extra long drill through the dagger board box. With a file I made this hole wider. Then the most exciting part had to be done: the routering. With a router/ edge cutter I followed the inside of the daggerboard case. The router has a little wheel for this purpose. The result was a professionally shape aperture. Job done.

Bottom

Afbeelding
The bottom has got a glass fabric layer. First I flattened the edge between bottom and first plank with thickened epoxy. Then I put the glass on it and added some epoxy which was left over. This bit however was already warm and curing. A mistake. The result was that this epoxy was too thick to saturate the glass and the wood under it. I immediately made new epoxy, removed the glass a little and added it to directly on the wood. When I stretched the glass again, the fabric stayed frilled. It was hard work to 'repair' that. On one place I had to cut the fabric over 10 cm, unfortunately. Second job: I glued both planks of the wood for the oars. Second fault: I shoud have put something on the floor because of the drips op epoxy. Now, the day after, all looks well. Epoxy cured, no strange spots on the bottom. I am looking forward to the shaping of the oars but not to the necessary sanding of the boat. For making the oars perfectly round, I made a little wooden tool. Later I w

Mast

Afbeelding
Today I bought the wood for the mast. Two parts which I glued together with thickened epoxy in order to prevent it from getting bent. I also used the epoxy to glue the socalled gooseneck on the boom. It is the part which will hold the boom to the mast. One of the bronze screws splitted the gooseneck a little. I hope to make this mistake invisible by sanding it. I epoxied the yard again, one side of the rudder and some of the interior of the boat. For the oars, I ordered a little manual of CLCboats: "How to Build Your Own Oars". Is also comes with plans with dimensions. 

Fiberglassing

Afbeelding
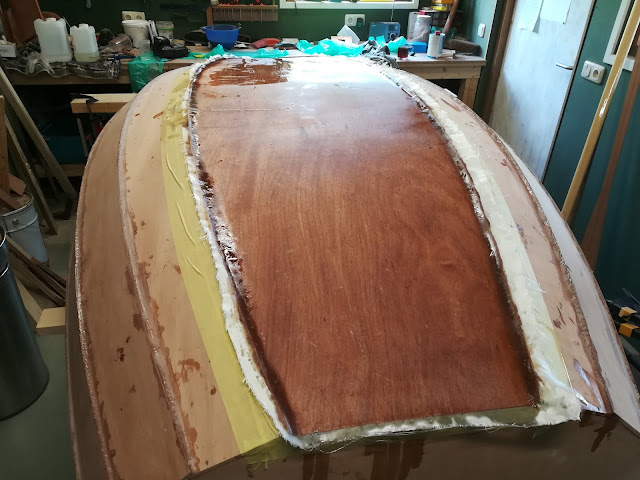
The bottom of the boat needed glassfiber, but when I unpacked the box, not all fabric was 200 grams. Most of it was 80 grams. I therefore laminated only the front inside part. I taped the outside of the area, spread the fabric, cut is and put the epoxy on it. With a squegee I saturated every part, so that the wood structure became visible again. The rest of the epoxy was used for some wooden parts, including the second of the two spars (boom and sprit) and for strengthening the dagger board case. To be sure that the mixed epoxy started to cure, I waited a little before using it. But when I started to put it on the boat, it was already hot. Just when I was finished, the stirring stick stuck in the pot... With a gloved thumb wetted with denatured alccohol, I smoothened the rough surface of the thickened epoxy around the daggerboard case. Everything looked nice until I removed the tape, causing an ugly rim. I tried to save it by pushing it, but I will still have to sand it when it is cu